
How to Braise Vegetables for Delicious, Heart Healthy Comfort Food
Meats are the most commonly braised foods, and you’ll recognize this technique with dishes like pot roast, short ribs, or pork belly—although, really, almost any food can be braised. Vegetables are especially great for braising if you want to bring out their more hearty, wintry, even meaty side. Since braising brings out the sauciness, earthiness, and savory quality of a food, it’s a wonderful technique for wintertime fare. Here’s how to braise vegetables in a few easy steps.
At its heart, the method of braising consists of searing a food in a bit of fat, then slowly cooking the food in a small amount of liquid (covered), then, once the food is finished cooking, reducing the remaining cooking liquid into a sauce or gravy, and serving atop the cooked food.
Step One: Prepping the Veggies
First, select your vegetables to be braised. You can use almost anything here, although especially nice choices for braising include root vegetables, cruciferous vegetables, and summer squashes. You may cook your vegetables whole or chopped, it’s up to you, as long as the vegetables are cut down to the same size, and if you’re using different vegetables, they’re cut down to whatever size needed so that they’ll cook evenly in the pot together. (For example, if you’re braising carrots and zucchini together, you would cut the carrots a bit smaller than the zucchini, as zucchini hold much more water than carrots and will cook much faster, so to avoid the zucchini falling apart as the carrots are still cooking down, they’ll need to be in bigger pieces than the carrots.)
Step Two: Searing the Veggies
Searing your food is what gives them a bit of that sweet, brown crust that’s typical of braising, and that light outer crust also protects it from getting too dried out as it cooks later in the liquid. For vegetables, this isn’t as crucial of a step as when cooking with meat, but it still gives a really lovely touch of crust and flavor in the end. To sear the veggies, select a large oven-safe deep skillet, and heat a tablespoon or two of olive oil in there over medium heat (you don’t want the heat so high that the oil smokes). Add the vegetables and cook until lightly browned on all sides, turning once or twice while cooking.
Step Three: Add the Cooking Liquid and Braise
Next, add the cooking liquid to the skillet. You want just enough liquid to cover just about half the height of the food in there. (Typically, when braising meats, it’s easy to measure half the height of the slab of meat in there, but it’s a bit trickier with vegetables, as they don’t stand quite as tall as meat.) Your cooking liquid of choice is up to you—common picks will be broth, water, wine or beer, or even apple juice for a sweet/savory combination. Once poured in, cover the pan and place in a preheated 350F oven. Cook 20 to 35 minutes, depending on how many vegetables you have in your skillet. Check at 20 minutes for doneness—if the vegetables are quite soft and lightly browned, they’re done. If not, give them another 10 minutes or so.
Step Four: Reduce the Sauce
Now’s the fun part: making a reduction sauce. Once the vegetables are done braising, remove them from the cooking pan to a serving platter using a slotted spoon so as to keep all that great cooking liquid in the pan. Place the pan on the stovetop and heat over medium heat until you get a simmer. Keep simmering the liquid until it cooks down into a thick sauce. Since you’re making a sort of gravy here, there are all sorts of delicious things you can add to the reduction sauce as it cooks to flavor it: fresh or dried rosemary, fresh or dried thyme, finely minced garlic or onion, a teensy splash of balsamic vinegar or lemon juice, and even a small bit of butter or olive oil and flour to help the sauce thicken as it reduces. It’s all trial and error, and up to the chef, as to how thick and how flavored you want your sauce to be. Once thick enough to coat the back of a spoon, drizzle over your plated vegetables and enjoy.
Alternative Braising: All On the Stovetop
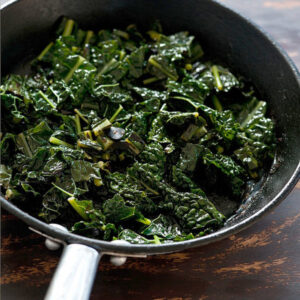
You can also braised your vegetables directly on the stovetop instead of placing it in the oven to cook, and this of often done for braising leafy vegetables like kale, chard, and cabbage. Just add a bit less liquid to the skillet and keep an eye on the vegetables to make sure they don’t burn or get too dried out too quickly.
Related on Organic Authority
Braised Organic Lamb Shanks with Wild Mushrooms served on Roasted Garlic Mashed Potatoes
Cider-Braised White Beans Recipe with Rosemary and Thyme
Image adapted from Flickr, jules:stonesoup, CC BY 2.0