How to Make Your Own Dog Toys
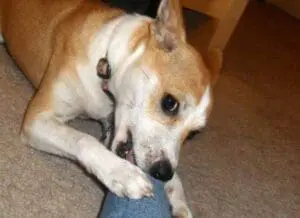
When my puppy Lady gets a squeak toy, it’s like she’s got a box of cereal with a prize in the middle. She immediately tears through the thing to find the plastic squeaker in the center — and then chews it to shreds. As you can imagine, that results in her ingesting a ton of chemicals that aren’t good for her — PVCs in the plastics as well as pesticides and hormones used to make other materials — and, of course, it produces a lot of waste.
That’s why my husband and I have opted to make some of our own dog toys from materials that we already have around the house. It’s easier than you think!
Step 1: Gather materials.
Sift through that bag of clothes you’re about to donate to Goodwill, and look for cotton products, preferably of the dye-free, organic variety. I tend to select the items that no one would want anyway, like that old shirt with a wine stain from your last birthday party. You know the one I’m talking about.
Another seemingly endless source: mismatched socks. We all have them. No one knows where the other half went, but now you can put the one you have to good use.
I also like to use what I think of as “leftovers” from my dog’s last battle with a chew toy: the stuffing that ends up all over your floor. Instead of throwing it out, consider storing it for the next time you make some toys.
Step 2: Construct your toys.
Take that old shirt or pair of jeans, and remove any buttons, sequins, zippers, etc. In the end, you want just a simple piece of cloth with nothing your dog can rip off and swallow. Next, take this piece of cloth and fold it in half length-wise. This will become the pocket you stuff with those socks and “leftovers.”
Depending on how big the material is, you may be able to make one toy or several. If you’re not sure about size, think about the toys you see at the store and go for that range. You want something big enough that your dog can’t swallow it whole but small enough that it’s not cumbersome for him to trot about the house showing it off. Cut the fabric into as many squares or rectangles as required.
The next step is to sew up two sides of the pocket. Using a sewing machine is best, so the stitches are nice and tight, but you can hand sew if you don’t have that option. Then, take that extra stuffing and those lonely socks, fill the pocket out so that it looks like a small pillow, and sew up the last side.
If the appearance of the toy matters to you, consider this: your dog will likely drool, tug, and rip it to shreds anyways. Don’t add buttons, sequins, or other decorations to the toy, because these are easy for your dog to ingest. If you still want to add some charm to the toy, you can use a pattern to cut out a simple shape, such as a star or a heart before sewing it together.
Step 3: Play!
This is, of course, the best step (and sometimes the one that lasts the shortest amount of time!) But your efforts will be rewarded when you watch your pup gnaw on his new prized possession.
In the end, no chew toy is 100 percent safe, so keep an eye on your dog while he goes to town. If your dog swallows patches of fabric, he’ll probably be just fine, but if he ingests long “strings” of fabric, these can get caught up in the intestines and cause problems. And any sudden change in diet – whether food items, organic materials, or otherwise – can cause gastrointestinal issues for certain dogs. The important thing to remember is that most dogs eat all sorts of strange items without issue – I know mine do – but if you notice any behavioral changes, give your veterinarian a call.
If your dog rips the toy to shreds, don’t forget to pick up the “leftovers” for the next time you make a batch of new chew toys!
Image Credit: Kyle May