Tutorial: Upcycle an Old Sweater into a Cute Throw Pillow

Here in Atlanta, the weather is cooling down. Have you pulled your fall sweaters out yet? Chances are, there’s at least one sweater from last year that you’re not too excited about wearing. Maybe it fits a little strangely or you accidentally sent it through the dryer, and now it’s more than a little snug. Whatever the reason, you can give last year’s sweater a new life by turning it into a cute throw pillow! Check out our tutorial below.
Sewing Knit Fabrics
If you’re new to sewing knits, it might seem a little bit daunting at first. Knits love to stretch and unravel – especially older knits. I have learned a couple of simple tricks that have helped me with particularly fussy knit fabric in the past:
- Use a zig zag stitch. The zig zag allows the fabric a little give, so you’re less likely to have your stitches pop.
- Pin generously. Lots of pins will help keep the fabric from stretching too much. Choose pins with small heads – not quilting pins – so they feed smoothly through your machine.
- Increase stitch length. If your knit is being extra stretchy and fussy, use the widest zig zag on your machine to stabilize the fabric, then go back over it with the standard width.
- Use tissue paper. If even the wide zig zag isn’t helping, you can use thin tissue paper to help. Just pin the tissue paper right along with your fabric, then gently tear it away after you sew and toss it in the recycle bin.
OK, ready to get sewing?
Old Sweater to New Throw Pillow Tutorial
Materials
- old sweater that you’re no longer using
- organic cotton stuffing (I like Near Sea Naturals)
- scrap fabric (optional)
- iron
- sewing machine, thread, pins, fabric scissors
- chopstick or wooden dowel, optional
- embroidery needle and embroidery thread for hand sewing
Directions
1. If you’re using a wool sweater, I recommend sending it through the washer and dryer. This is a no-no for wool you want to wear, but what you’re doing here is called “felting.” The fibers will shrink and give you a tighter weave that’s easier to work with. If it’s not wool, don’t worry! This step is totally optional.
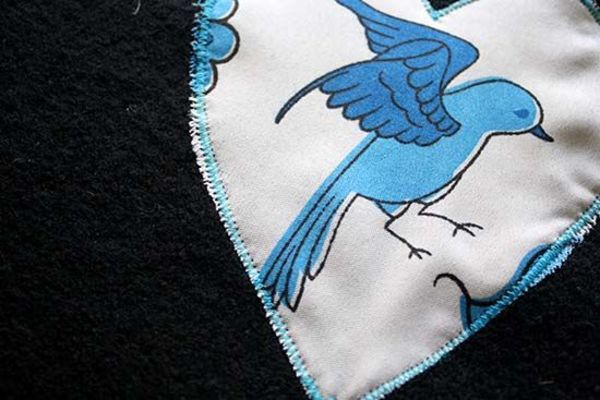
2. Cut out your applique, if you’re using one, and iron it. I cut out a heart to embellish my pillow. You can do any shapes you want or skip this step altogether!
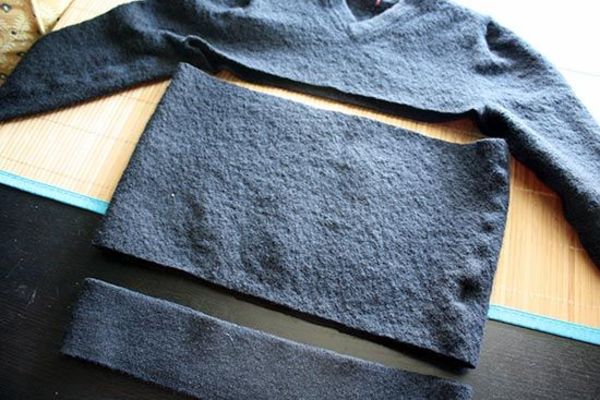
3. Cut your sweater, as shown in the photo below. What you want to do is end up with a rectangular loop of knit fabric. You can set aside the bits you cut off for other craft projects.

4. Sew on your applique, if you’re adding one, using the zig zag stitch all the way around. You want the outside of the zig zag to be just outside of the applique’s unfinished edge. This will keep it from fraying

5. Turn your fabric loop inside out, and pin. Sew one of the unfinished sides of your pillow closed completely. On the other unfinished side, sew from the corner of the pillow and stop about 1/3 of the way down the unfinished edge. Leave a 2″-3″ gap in the middle, then pick up your stitching again and sew from there to the other corner. The idea here is leaving a gap so that you can flip the pillow right side out again.
6. Speaking of flipping it right-side-out, do that! Then, get stuffing! You want to stuff it as firmly as you can to keep it from getting lumpy later on. If you’re having trouble getting your stuffing into the bottom corners of your pillow, use the chopstick or dowel to get it where it needs to go.
7. It’s time to close off your pillow. You can just top stitch it in your machine, but with that stuffing in there, that’s kind of clunky, and your stitching will be visible. The best stitch to close your pillow is a ladder stitch. This video does a great job illustrating how to do a proper ladder stitch. For your knit fabric, use your embroidery thread to do this last part:
{youtubejw width=”500″ height=”400″}5CjOXMuTFXo{/youtubejw}
That’s it! Enjoy your cute, new throw pillow!
Image Credits: Photos by Becky Striepe

