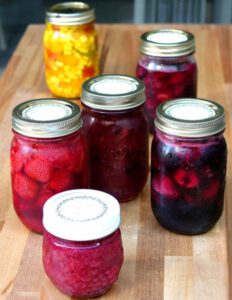
7 Home Canning Tips for Beginners

Canning your own food is one of the great joys of home gardening. The process is relatively simple once you have your supplies, so just follow our seven canning tips for beginners to get started.
First off, if you’re wondering why you should can, consider the benefits: It’s economical, eco-friendly and reduces food waste. And, in your own canning, there are no additives or BPA. Plus, your home-canned goods taste better and are fresher than commercial canned goods. Did we mention that it’s fun and a lot easier than you might think? It’s true! So read on for these simple home canning tips for beginners and get ready to preserve your favorite foods today!
1. Equipment: Canning jars, lids and a canner are necessary to get started. For most beginners, a water bath canner is the easier way to start rather than a pressure canner. You also may want a kit of tools including a ladle and jar-lifting tongs.
2. Sterilization: Start the process by sterilizing your jars, lids and rings. Wash them first in warm, soapy water. Rinse and then move them to boiling water for sterilization. Remove the jars, but leave the lids in the hot water until you’re ready to can. This ensures the lids won’t be tainted before sealing.
3. Prepare Fruits and Veggies: Once your supplies are ready, slice and dice your fruits or vegetables. This is best done immediately before canning to keep the food at its freshest. And, it’s best to can them as close to the time you harvested to keep the most nutrients in the food. Lemon juice should be added to tomatoes to adjust pH and can be added to fruits to prevent browning.
4. Fill Jars: On most jars, there is a fill line. Be sure not to fill past this point because the produce expands during the boiling process. After you’ve packed in the produce, you’ll add liquid to the fill line (except in the case of jams and jellies). Add boiling water or pickling brine for produce. Make sure the top of the produce is covered, wipe the rims and fasten the lids.
5. Process the Jars: Submerge the filled jars in boiling water and process according to your canning recipe (usually from 10-20 minutes in the boiling water). Alternatively, if you’re using a pressure canner, process at the suggested pressure for the amount of time recommended for that type of produce.
6. Remove Jars and Let Cool: Once processed, remove the jars with the tongs and let the jars cool on a flat surface. Your lids should pop in during this time. If the lid on any of the jars pops out, place it in the refrigerator as it isn’t properly sealed.
7. Label and Store: Label your jars with produce or recipe name and date. Store in a cool, dark place until you’re ready to eat!
Related on Organic Authority
9 Tips on How to Can Food, Preserve It, Dry It or Ferment It to Savor Summer’s Flavors All Year Long
Yes We Can! 9 Ideas and A How-To for Canning Your Favorite Foods
Preserving 6 Summer Favorites for Winter: Freezing, Canning and More!

