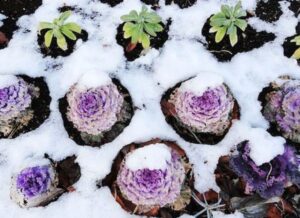
8 Steps to Prepare A Winter Garden

Many garden veggies and flowers are dying off while the others are preparing themselves for the ensuing colder weather. As your tomatoes, peppers, cucumbers, squash and annual flowers die off, and your trees and and shrubs begin losing their leaves, it’s time to put your winter garden to sleep. Use our short guide to learn how to clear non-productive plants, protect perennials and keep hardy greens like kale and cabbage in your winter garden as long as possible.
Cleaning up your winter garden before cold weather sets in is important in order to minimize the amount of work to be done in the spring, to deter diseases and pests and to give your compost fresh greenery to feed on. It’s also a good idea to make a mental or drawn out chart of where certain crops have grown during the season, so that you can practice crop rotation when planning next year’s garden.
8 Steps To Prepare A Winter Garden
Step 1: Pull up all the annuals that aren’t producing anymore, roots and all. Some of your annuals may still be producing if you live in a warmer climate, but make sure to harvest any fruits if colder nights or wet weather are becoming frequent. Leave hardier annuals like kale, broccoli, cabbage and beets in the ground until the first hard frosts are in the forecast.
Step 2: Make sure to properly store any of the vegetables you can still harvest off of plants that you are going to take out of the garden. Winter squash will hold best at room temperature in a dry environment, while most other vegetables will prefer cool and temperate storage.
Step 3: Weed cleared winter garden beds and around perennial plants to reduce work in the Spring. This is especially if spring weather in your causes wet, muddy soil.
Step 4: Deadhead (remove old spent blooms, including any developing seed) and cut back your perennials to 1-2 inches above soil level. These include flowers (such as phlox, dahlias, lilies and hollyhocks), herbs (such as oregano, marjoram, thyme, rosemary, mint), vegetables (such as artichokes, some varieties of kale and broccoli) and fruiting bushes (such as blueberries, raspberries, blackberries).
Step 5: Compost any annual plants and stalks of perennial plants in the method that works best for you. Layered composting is best for killing off any pests or seed heads in your composting material. If any of your plants, especially ones in the nightshade family (tomatoes, peppers, eggplants, potatoes, etc.), showed signs of disease or fungus during the growing season, do not compost them but discard them in another place that you don’t plan on planting.
Step 6: Rake up yard leaves and either add them to your compost or use as mulch. Berries especially love acidic tree leaves, so mulch your berry bushes with oak or cherry leaves, as well as pine needles. Wood chip mulch is ideal for flower gardens, perennial veggies and fruiting bushes.
Step 7: Turn over any cleared spots in your winter garden with a tiller or the hand-forking method. This will help eliminate some pest problems, such as eggs or grubs from undesirable insects, as they will be broken up or brought to the surface of the soil for bird feed.
Step 8: Plant a cover crop in cleaned beds to help infuse essential nutrients into the soil. Beans (especially fava beans) and peas are a great cover crops that help fix nitrogen and potassium into the dirt. A cover crop will grow until the first hard frost, then die with the stalks laying on the ground to protect your garden from weeds.
Related on Organic Authority:
Winterize Your Home and Body Before Fall Turns to Winter
5 Colorful Plants for Winter Gardening
Guide to 5 Indoor Winter Gardening Sensations
Image: foody.chen

