
You Can’t Go Wrong With This Foolproof No-Knead Dutch Oven Bread
Say goodbye to the days of nursing your sourdough starter and try this no-knead Dutch oven recipe instead.
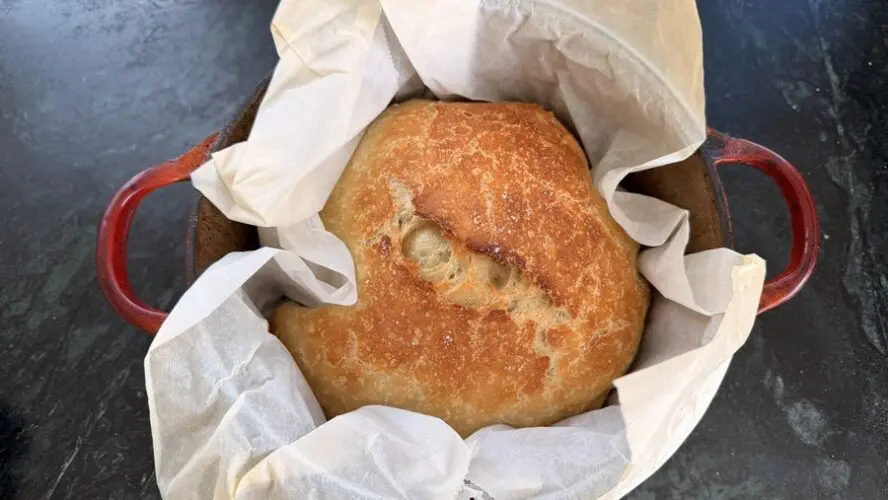
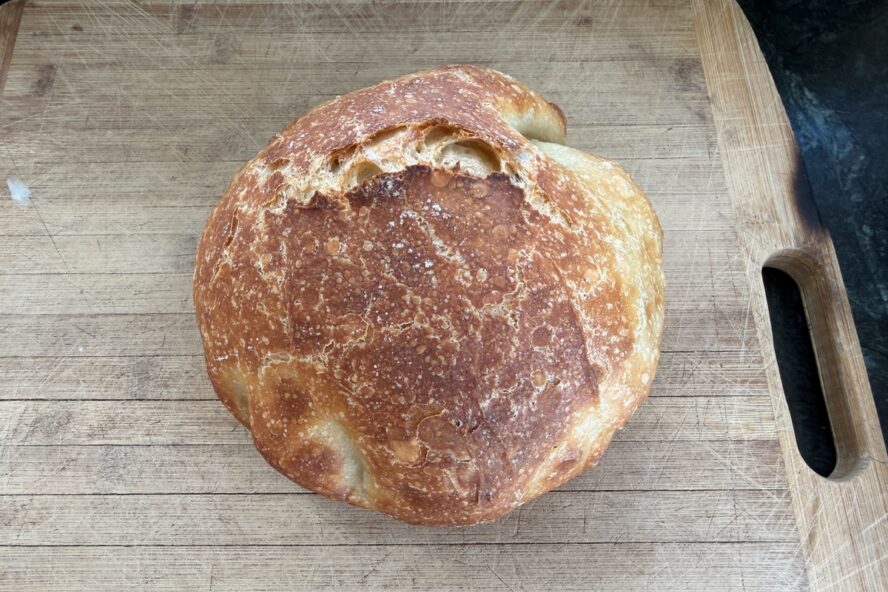
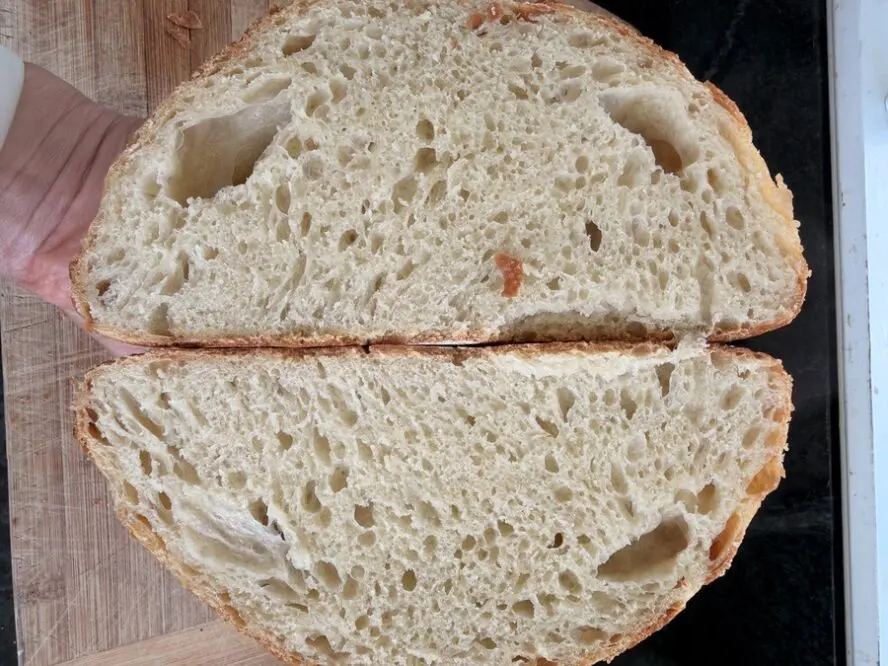
If you’ve dreamed about starting a bread baking routine but haven’t been able to commit to maintaining a sourdough starter, this easy no-knead bread recipe is for you. It’s largely hands-off and produces a golden-brown loaf with a thick, crackling crust and fluffy, airy crumb. And since this loaf relies on yeast to rise, you won’t need to worry about coddling a starter. Here’s how to make the best no-knead Dutch oven bread.
Why This Recipe Works
The key to making a bakery-worthy loaf at home without kneading the dough or feeding a sourdough starter is to give the dough enough time to ferment — and to bake it in the right vessel.
Using a cast iron Dutch oven or bread oven with a tight-fitting lid is essential for shaping the loaf and creating the chewy crust. The lid traps steam, which helps the dough rise during the first half of the cooking. The heavy-duty cast iron also gets very hot and conducts heat evenly to create a crisp, dry crust.
Ingredients
Contrary to popular belief, bread is a simple food to make, especially in terms of ingredients. All you need for this recipe is:
- Flour. Choose organic bread flour if possible.
- Salt. This is essential for flavor. It also helps to soften the gluten in your bread for a fluffier texture.
- Olive oil. A bit of added fat enriches the dough so it’s soft and pliable. It also helps the bread take on a little more of a golden color as it bakes.
- Yeast. Use active dry yeast to give this dough its springy texture and height.
- Water. Use room temperature water to help activate the yeast.
Substitutions and Variations
Standard Ingredient Substitutions
- Bread flour has a higher protein content than all-purpose, so it provides the bread with more structure and chew. In a pinch, however, you can make this recipe using all-purpose flour. You can also experiment by replacing a portion of the total flour with whole wheat for a more nuanced flavor.
- If you’re out of olive oil, try swapping it for avocado oil. I would avoid using a stronger-flavored oil, such as sesame, which will change the taste of your bread.
- Kosher salt is the best choice for seasoning this dough; other salts have different-sized crystals which will impact the quality of the bread and its sodium content.
Flavor Variations
Since this Dutch oven bread recipe uses a no-knead dough, it’s pretty forgiving to flavor add-ins as long as you don’t overload the gluten structure. Try mixing in these flavor boosters during the folding and shaping process, and cap mix-ins to around ¾ to 1 cup total to preserve the dough’s ability to hold structure during the ferment:
- Rosemary & garlic — 1 to 2 tablespoons of chopped fresh rosemary and two minced garlic cloves
- Cheddar & jalapeño — ½ to ¾ cup shredded sharp cheddar + 1 to 2 diced jalapeños (seeded for less heat)
- Cranberry walnut — ½ cup dried cranberries + ½ cup toasted walnuts
- Kalamata olive & herb — ½ cup chopped pitted olives + 1 tsp dried oregano or za’atar
- Roasted garlic — a whole head, squeezed out and folded in, for a mellower garlic flavor than raw
HOT TIP: If any of the mix-ins you choose are high-moisture (like the Kalamata olives or diced jalapeños), your dough may need a few extra minutes in the oven during the covered portion of your bake.
You can also sprinkle on some toppings just before baking, such as:
- Flaky salt + cracked pepper
- Everything bagel seasoning, sesame seeds, or poppy seeds
- A dusting of extra bread flour or rice flour for a rustic bakery look
How to Make No-Knead Bread
This bread comes together in four stages, each with its own waiting period, so it’s worth knowing what to expect before you start.
You’ll begin by mixing the dough — just flour, salt, yeast, and water stirred until sticky (I like to use my hands for this step!). Then cover the bowl with a dish towel or some reusable Beeswax wrap and let it sit at room temperature for 12 to 14 hours. This long, slow ferment is what builds flavor and structure without any kneading, so resist the urge to rush it. You’ll know it’s ready when the surface looks bubbly and slightly domed.
From there, a quick fold and another 20-minute rest will relax the gluten before you shape the dough into a taut ball. Give it one final two-hour rise until it’s doubled in size, timing your oven preheat (with the Dutch oven inside) for the last hour of that wait.
When it’s time to bake, the dough goes into the screaming-hot Dutch oven and stays covered for the first half of baking, then uncovered to let the crust turn deeply golden. To test whether the bread is done, try knocking on the top of the loaf — if ready, you should hear a hollow sound. Let it cool completely (at least an hour) before you slice it up.
Temperature and Bake Time
This no-knead bread bakes at 450°F for a total of 45 to 50 minutes. For the first 30 minutes, you’ll keep the pan covered, then you’ll remove the lid for the last 15 to 20 minutes.
Tips for the Best Results
- Allow the dough to rest for long enough that it becomes visibly risen and bubbly, but not so long that it starts to deflate. Eventually, the yeast will stop fermenting, which will cause the dough to fall — you may end up with a pancake-shaped loaf if you let it rest for too long.
- Although you can technically skip the olive oil in this recipe, I recommend keeping it in because it enhances the texture and color of the loaf.
- Your bread will still continue to cook internally out of the oven, so be sure to let it cool fully (at least an hour) before slicing it.
What to Serve With It
It’s bread — you know what to do! You can keep it simple or go crazy. Serve it smeared with butter and flecked with flaky salt, serve it alongside our cozy and cheesy lasagna soup, or toast it into these broccoli rabe crostini for a crunchy appetizer. And don’t even get us started on the sandwich opportunities — try this curry chicken salad sandwich, a vegetable and basil panini, three cheese and tomato panini, a cozy Croque Monsieur, or even a classic breakfast sandwich.
Storing & Reheating
After cooling, store the bread in a zip-top bag at room temperature for up to four days. You can also freeze the bread, whole or sliced, in an airtight container for up to six months. To defrost a whole loaf, run it under water for a couple of seconds, then place it in a 350°F oven for 20 to 30 minutes until it’s soft in the center.
To defrost individual slices, wrap them in a damp paper towel and microwave for 10 seconds.
More Easy Recipes to Try
No-Knead Dutch Oven Bread Recipe
STEP 1:
In a mixing bowl, combine the flour, salt, and yeast. In a liquid measuring cup, combine the olive oil with 1½ cups room-temperature water. Slowly add the water and oil to the flour mixture, mixing with your hands until you have a shaggy, sticky dough. Cover the bowl and let rest at room temperature for 12 to 14 hours.
STEP 2:
Transfer the dough to a lightly floured work surface and gently push it into a rectangle shape. Fold the dough in half first the long way, then the short way. Place it seam side-down, cover it again on the work surface, and let it rest for another 20 minutes.
STEP 3:
Shape the dough into a ball by cupping your hands around it and gently pulling it towards you while twisting clockwise. The dough should stick slightly to the work surface, so it becomes spherical as you turn your hands. Place the dough on a lightly floured piece of parchment paper, cover it, and let it rest for about two hours. It should double in size.
STEP 4:
During the last hour of rising, preheat the oven to 450°F and place your Dutch oven into the oven while it heats.
STEP 5:
When you’re ready to bake, carefully remove the hot Dutch oven from the oven and quickly transfer the dough, parchment paper and all, to the pot. Cover and bake the bread for 30 minutes, then remove the lid and continue baking for 15 to 20 minutes, until the crust is browned.
STEP 6:
Remove the loaf from the pan and cool fully on a wire rack before slicing.
Frequently Asked Questions
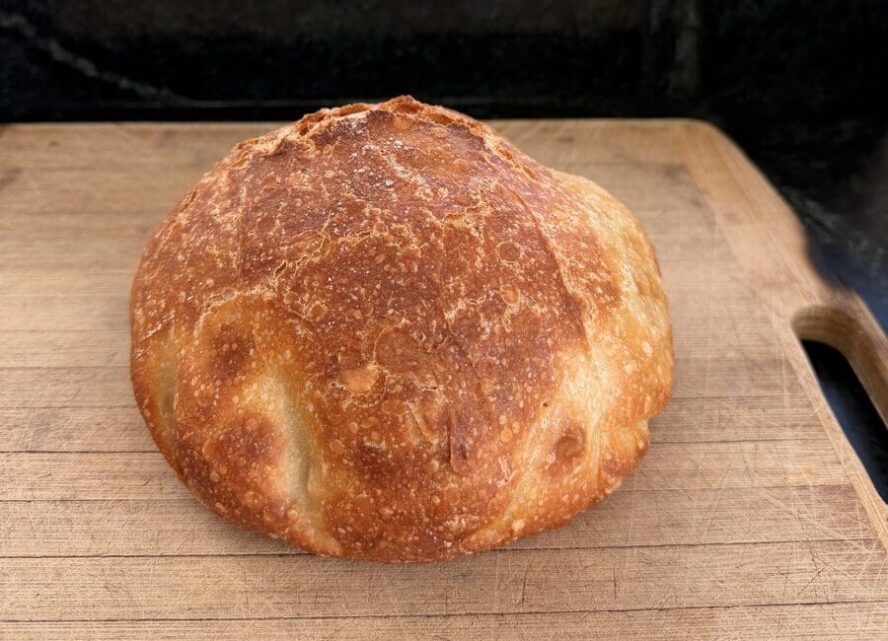
A Dutch oven improves the quality of your crust and the shape of your bread. It gives you a thick, toothsome crust with a golden color and tiny blisters on the surface. It also helps support the loaf while it bakes for a more evenly-shaped boule.
Start baking the bread with the lid on to trap the steam as the loaf rises and forms its final shape. Then, during the last 15 to 20 minutes, remove the lid to encourage a golden color in your crust.
Be sure to cook your bread all the way through until it’s golden brown all over. To be really sure, you can take the temperature of the loaf. When the internal temperature reaches 190°F, the bread is cooked. Another common mistake is not letting your bread rise for long enough — or on the opposite end of the spectrum, letting it over-rise, which can cause it to fall and turn out flat.
Bread flour will produce the most toothsome bread with more structure, as it has a higher protein content than all-purpose.
Yes, you can bake this bread directly on a pizza stone or baking dish in your oven. However, it may not have quite the same rounded shape or thick, crackling crust.